


Lactobacillus and electrons
[click images to see a larger version]
There’s a lot of discussion about what color clay to use for seed balls. We discuss some of the theory behind that here, but thought it would be a good idea to put some of that to the test. I wondered if we could change red clay into gleyed clay and back again.
Here is the science question: Can the conversion of Ferric Iron (Fe+3) into Ferrous Iron (Fe+2) be observed in a reasonably short time frame, with the naked eye, and with reasonably common supplies? Is the reaction reversible in a similar timeframe?
Here’s what I did to investigate:
Hypothesis 1
The color of iron in the clay will most quickly change from red to gleyed in the presence of larger microbial populations, a food source, and anaerobic conditions.
Hypothesis 2
Gleyed clay will revert to reddish-orange when exposed to aerobic conditions.
The Clay
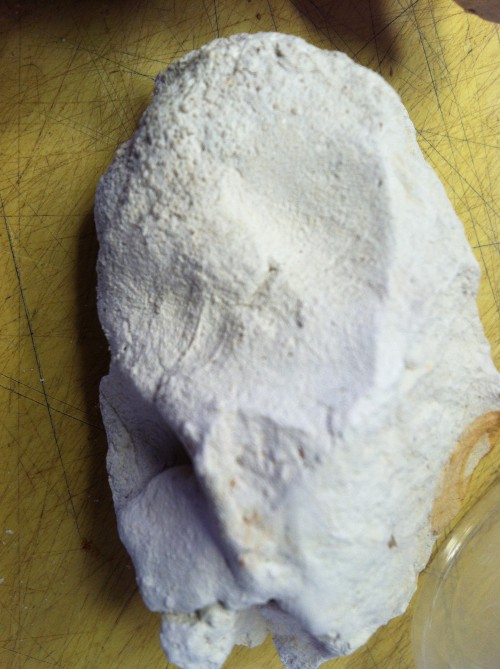
Gray art clay with no iron stains.
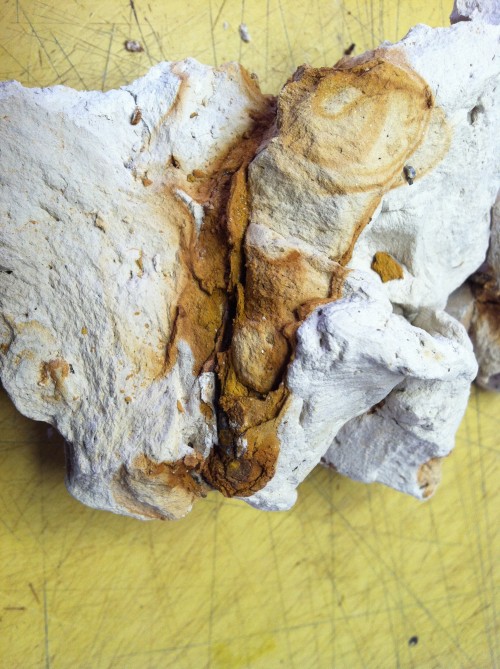
Gray art clay with iron stains.
I had some gray low-fire clay around from my sculpture days. When I made a sculpture, I often used iron wires to hold the clay in place. They left rusty stains on the clay. Here you can see two dried chunks of clay, one with iron stains and one without. The red stains are Fe2O3, or iron oxide (aka rust). The iron in rust is Ferric and has the charge of +3.
Preparation
I then powdered the clay, some gray and some rusty, in a mortar and pestle.
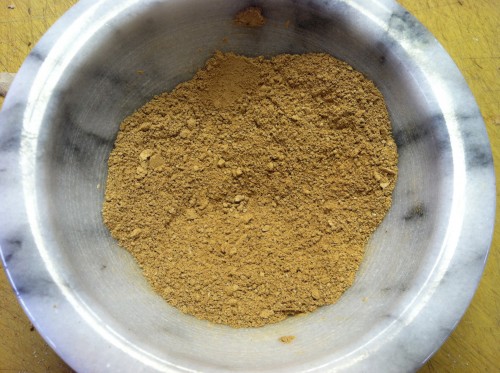
Ground iron-stained clay.
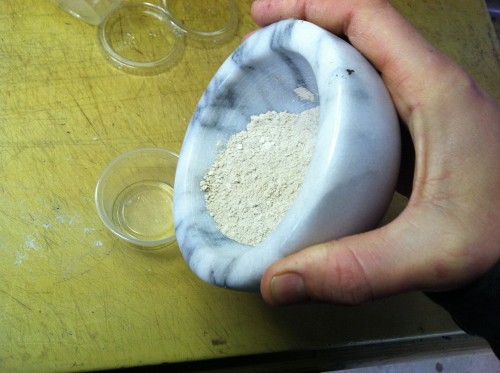
Ground unstained clay.
Treatments
The first treatment is the control. I set aside two containers of powdered clay, with no additives. This will serve as a color reference.
The second treatment is 10g clay and 15g water, placed in a sealed container. This will show how the color of the clay changes with water. It is not sterile clay, but will have fewer microbes and less food for them than the final treatment.
The final treatment is 10g clay, 15g water, and 5g bokashi starter in a sealed container. It will show how the color of the clay changes when in the presence of Lactobacillus and other anaerobic microbes, and a food (electron) source, the bran in the bokashi starter.
Results
t=0 days
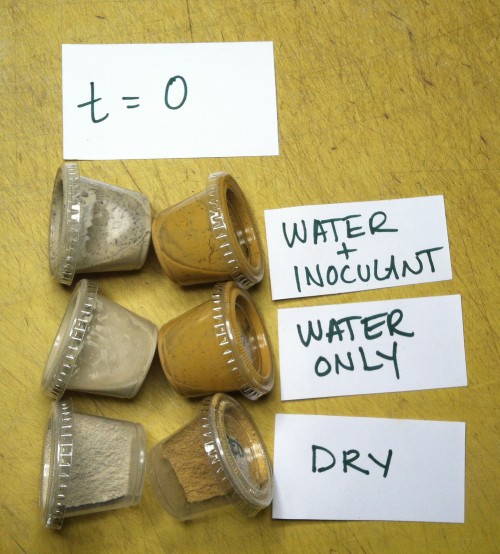
t = 0, the first day of the experiment, right after set up.
t=1 day (Bokashi bran treatment on the right- not a lot of change yet- just a bit of darkening)
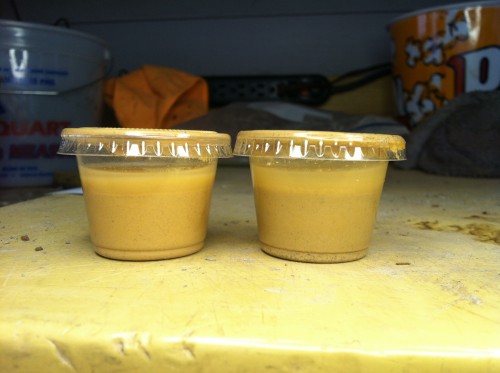
24 hours in, a darkening in the inoculated container (right) is barely detectable.
t=2 days: Beginning to see a difference here

Two days in, differences are becoming more apparent between the inoculated samples and the untreated ones.
t=2.5 days
The difference in color of the iron rich samples is becoming very apparent. The sample that has less iron also has some color changes.

At 2.5 days, the changes are distinct.
t=3 days through 4 days
Increasing changes progressively observed.
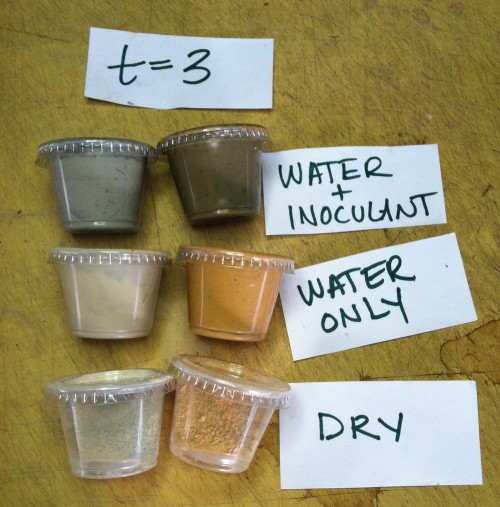
Day 3
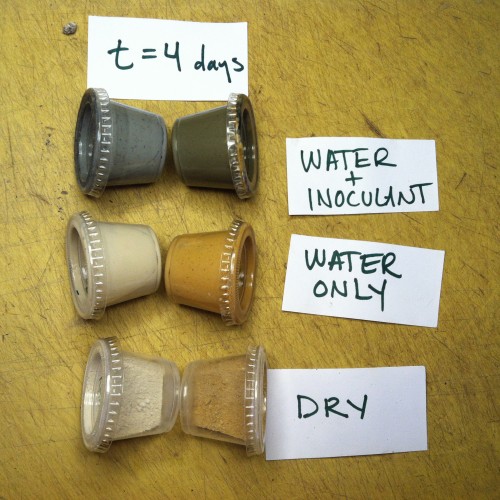
Day 4
At 5 days, the samples with inoculant are almost black, showing reduction in iron and possibly sulfur and manganese.
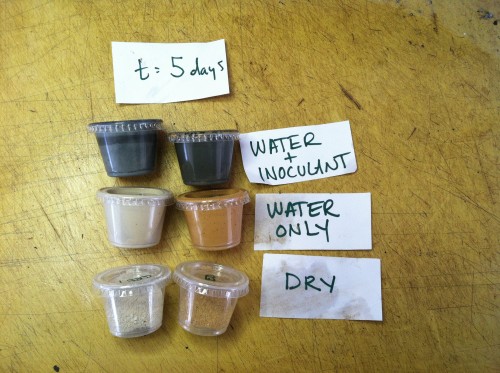
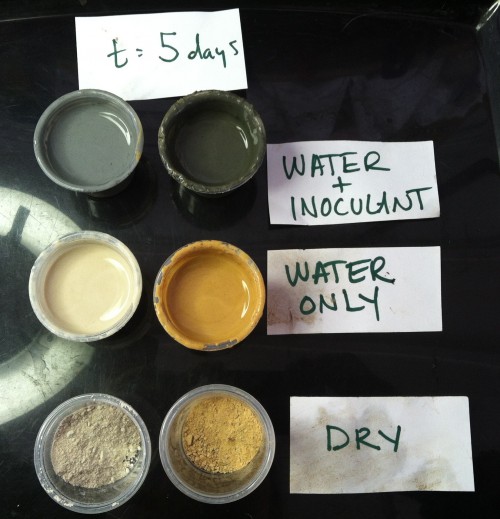
t=5 days
Significant color changes in the both the iron-rich and iron-poor inoculated samples. The black colors, especially in the iron-poor sample suggests sulfur reduction, a good indicator that the Iron has been fully reduced.
t=5 days – opened for drying
Here you can see the top suface of the samples upon opening. Whew! Did it stink! Definitely sulfur reduction and the rotten eggy release of H2S. Un-inoculated samples indicated little change through the 5 days.
I opened the containers, rotten egg smell confirms sulfur reduction.
t=5.5 days – opened for drying 0.5 days
I expected the colors to begin changing reflecting oxidation, but not so rapidly! You can see the top layer of the iron-rich inoculated specimen has already changed to its ferric state.
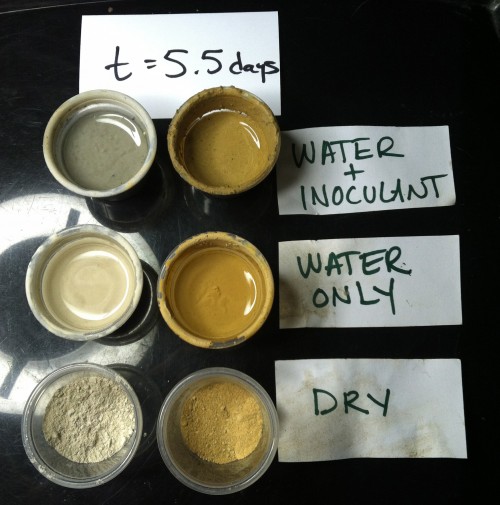
After only half a day drying, the colors on the surface of the containers suggest oxidation.
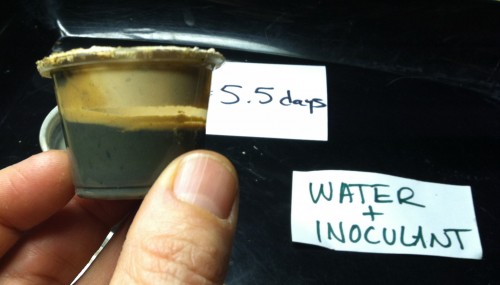
A close up of the iron-rich sample shows oxidation happening at the surface as the container dries.
t=7 days – opened for drying 2 days
Two days after drying, the iron-poor sample with inoculant is showing signs of oxidation. The black color is disappearing as the sulfur is oxidizing, and the stink has dissipated. A skin has formed on that sample that seems to slow the drying. The iron-rich inoculated sample is nearly completely dry.
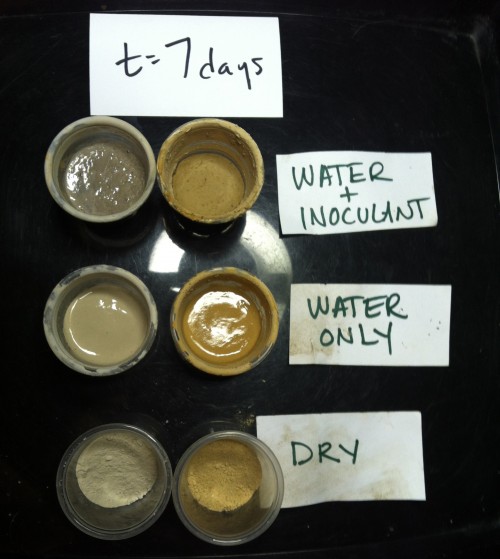
After 7 days, (2 days of drying), the surface of the inoculated samples appear fully oxidized.
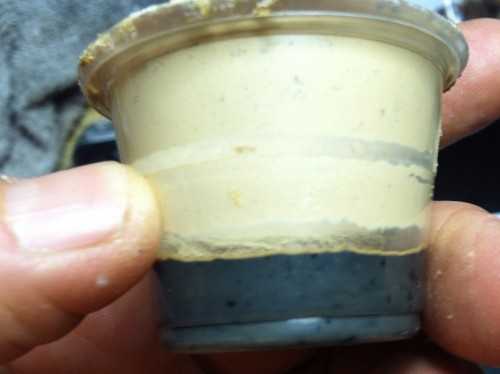
A crust has formed on a sample after two days drying, resulting in a distinct redox boundary.
t=10 days – opened for drying 5 days
Five days after drying, the iron-poor sample with inoculant continues to oxidize. The iron-rich inoculated sample is completely oxidized and dry, bearing close resemblance to the sample that was not inoculated.
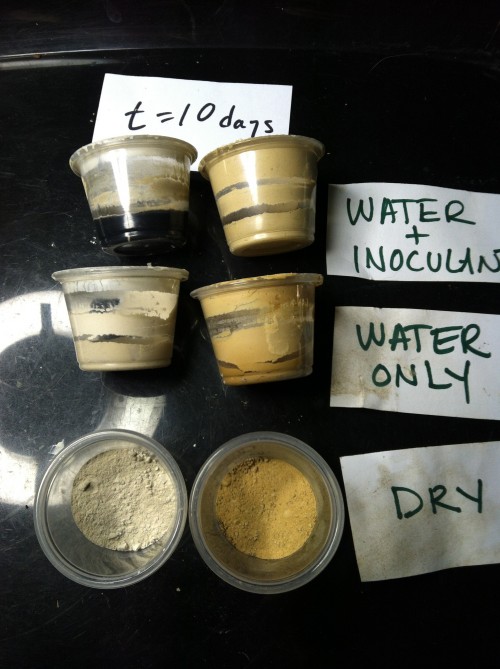
Continued drying is made apparent by color and texture. A crust still prevents deeper oxidation in the iron-poor inoculated sample.
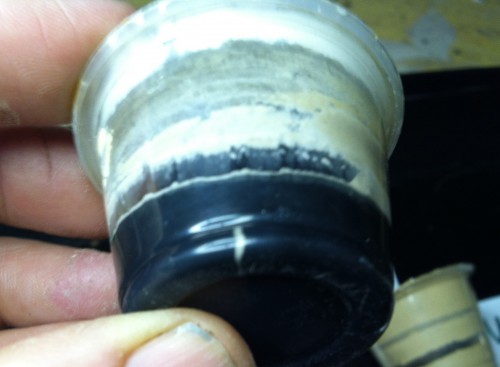
A distinct redoximorphic boundary.
t=12 days – opened for drying 7 days
All samples are dry and fully oxidized. The inoculated specimens again look much like the specimens without inoculant and the controls without water, even the sample that formed the tough skin.

After 7 days drying: All dry! All oxidized!
Conclusions
Both hypotheses have been verified. Redox in clay as indicated by color changes and smell is rapidly induced through the presence of anaerobic conditions, bacteria and a food source and reversed by the addition of air at the seed-ball scale. Just anaerobic conditions were not sufficient to bring about reduction.
Based on these conclusions, it is reasonable to suspect that when seed balls are made, regardless of the color of the clay, the addition of live compost and water coupled with slow drying might begin to induce some redox conditions. Any redox that has been induced will be reversed as the seed balls dry. Both red and gray clay are capable of undergoing reduction and oxidation. The claim that grey clay should not be used on the basis of oxidation state should be weighed with some skepticism.

A very nice experiment that answered my question about the type of clay I was planning on using in a wet riparian environment.
You’re welcome, Earl! Let us know if you have other questions. Dr. Blake Ketchum grow@seed-balls.com
We are planning an experiment with floating seedballs to propagate native willows, smartweed, and some pollinator plants in a desert irrigation reservoir. this experiment helped answer some questions about which clay to use and a few more soil tests we need to do. Thanks
Great! Glad to hear we provided some helpful information!